
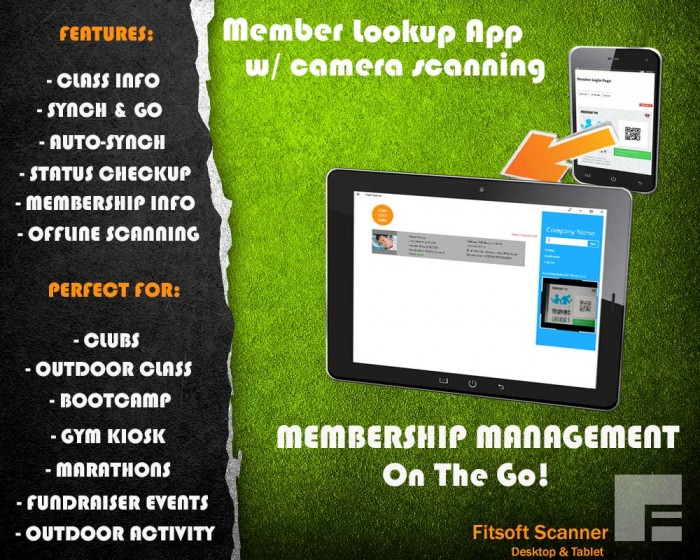
Fitsoft Scanner App
A.) Prerequisites:
- 1.) Windows 8.1 or 10
- 2.) Desktop Or Tablet
- 3.) Webcam scanning requires a webcam
- 4.) Click here for Windows 10 app
- 5.) Click here for Windows 8.1 app
- 6.) Sufficient Hard-disk Memory for Saving Member’s data (depends on the # of Members)
A.) It easy to have all of your members data with you wherever you go with Fitsoft Scanner app. Use it at your gym, studio or even at bootcamp. To download it, go to the Windows store and search for Fitsoft Scanner
- Scanning your members indoor & outdoor:
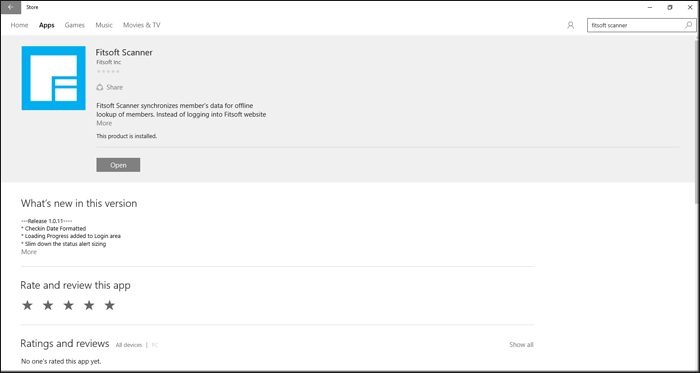
- Let start off by installing the app -> Go to Microsoft App Store -> Search for “Fitsoft Scanner” -> Install App:
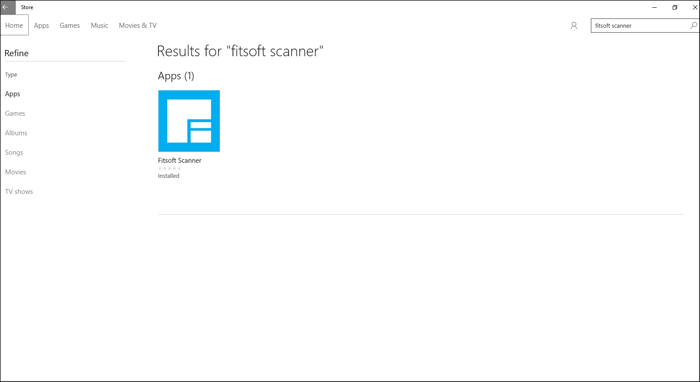
*If you can not find the app then you can go ahead and click on the links below:
For Windows 10
For Windows 8.1
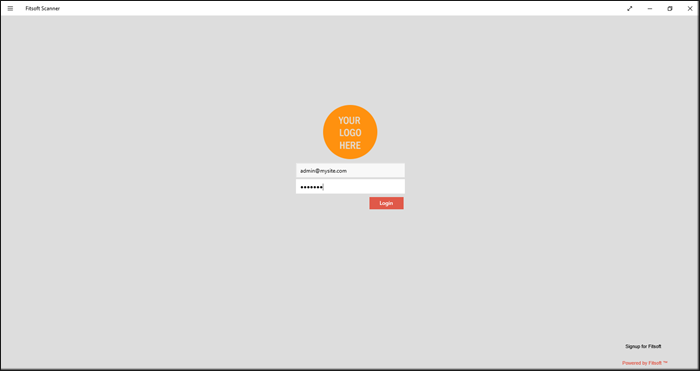
B.) Connecting Your Account:
- Once the app is downloaded. You need to have the app username & password to log in. If you already have our WordPress plugin then use that username(email address) and password.
- Here is the login screen and you can find the “Signup for Fitsoft” on the lower-right hand corner:
-
No username & password (create your account)?
Open up the signup area:
Go to the lower-right hand corner of the app
-> Click on “Signup for Fitsoft”
-> Go through the whole process of the Fitsoft Registration
-> Check your email because the username and password will be in there!
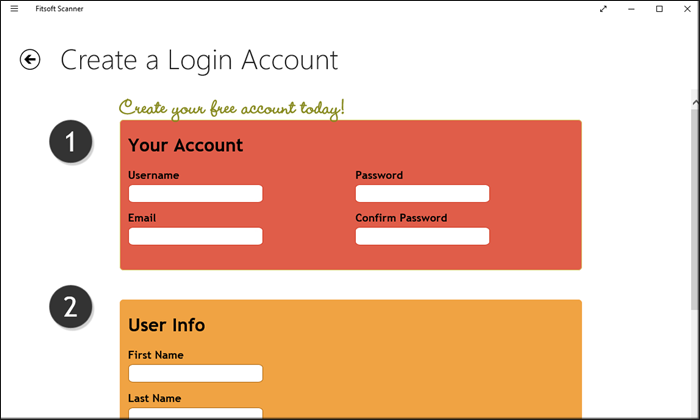
*Complete all step of the sign-up process and check your email inbox. -
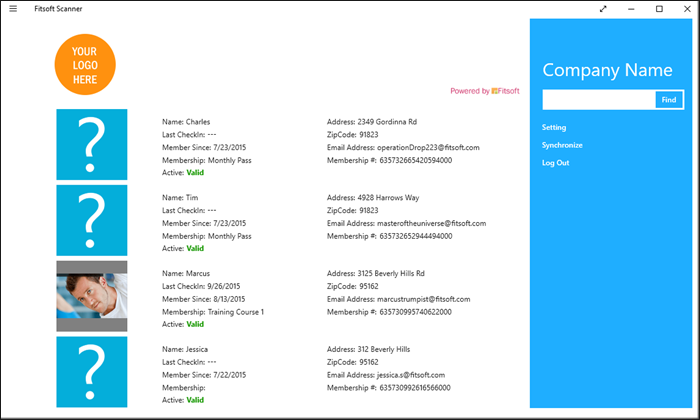
Login using the username(email address) and password should take you to the list of members page:
*Agree to all the permission of Background loading for synching and Camera.
C.) Synching your members:
-
When logging in for the first time the app will synchronize and retrieve all of the members.
-
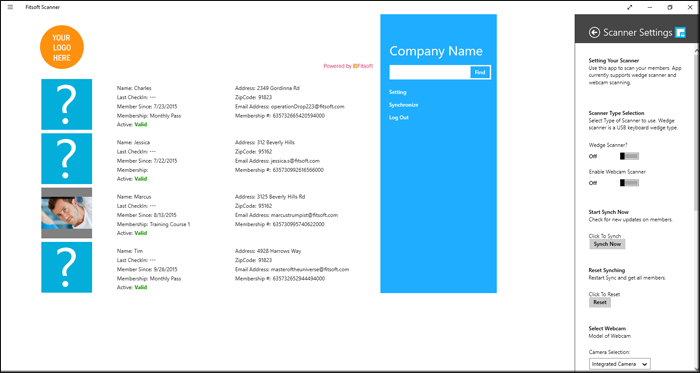
Checking for new data and members manually -> Click on Synchronize:
*The synchronize can be done at the Member’s listing area and also at the Settings -> “Synch Now”
-
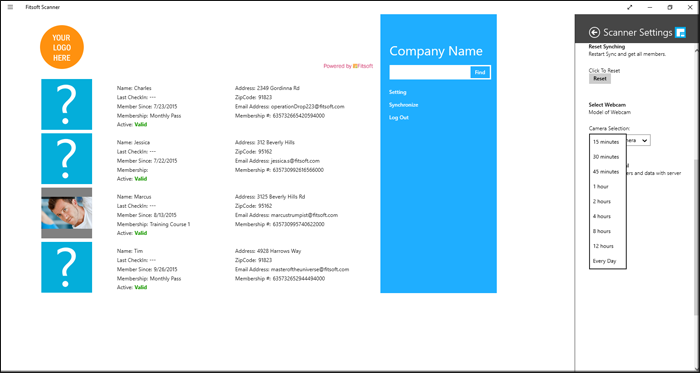
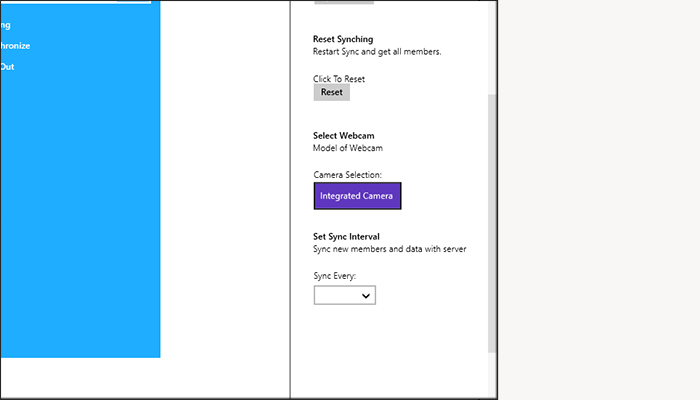
Auto-Synching can be done behind the scene in the app -> Go to Settings -> Synch Interval -> Set the in-between time to synch:
*Synching Requires that you have an internet access. If there is none then there will be no synching done.
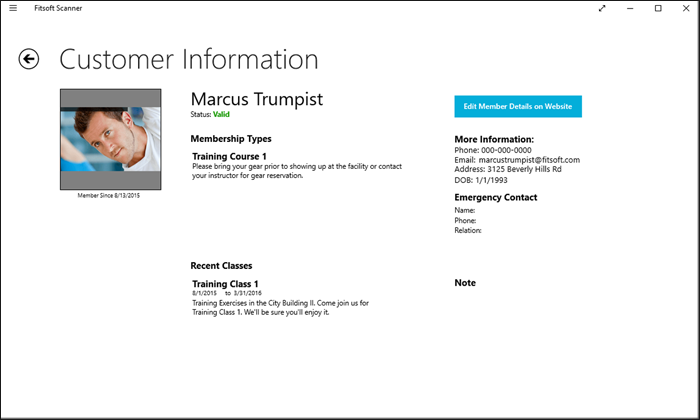
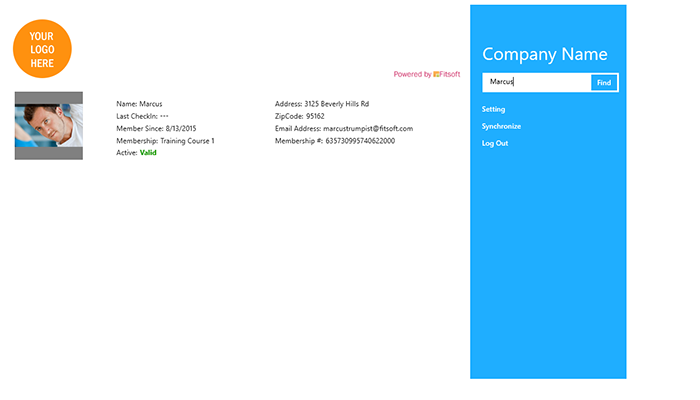
E.) Member’s Detail:
-
Click on a member to go to the member’s detail page
-
Member’s detail page will give you the general information about the member’s membership, classes, notes, and emergency contact:
-
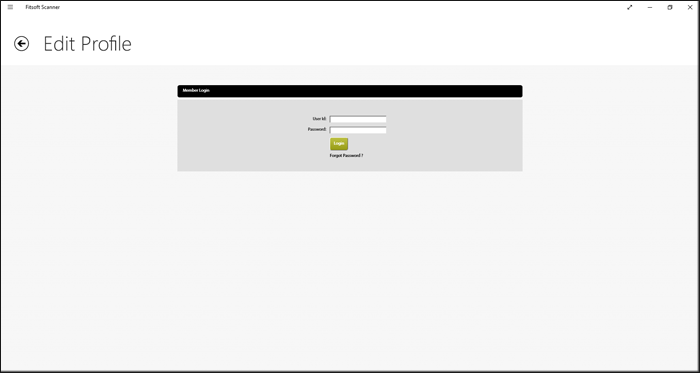
Editing member’s information -> Click on “Edit Members on Website” -> Log in using your credential:
*Synching Requires that you have an internet access. If there is none then there will be no synching done.
D.) Editing Member’s Detail:
-
Editing member’s information requires you to log in again (just in case you misplaced your tablet) -> Click on “Edit Members on Website” -> Log in using your credential:
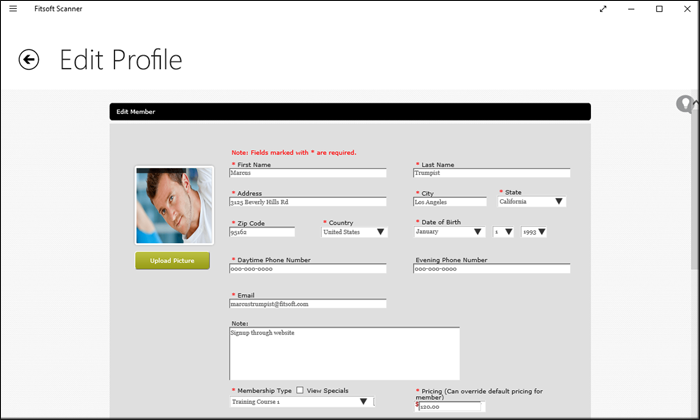
-> Once Logged in you can edit the member:
*Editing Requires that you have an internet access.
F.) Scanning:
-
Scanning is compatible with a keyboard wedged usb scanner. It will always pull up the member’s record and check them in automatically. If no USB wedged scanner is presented you can offset the scanning task to a web camera:
-
Turn on web camera -> Go to Settings -> Turn on “Enable Webcam Scanning”:
*It will select your default webcam -
Change Camera -> Settings -> Select a camera in “Camera Selection”
-
To Scan using the webcam position the member’s QR-Barcode in front of the camera:

* If your camera has low resolution, scan member’s printout instead or have the member enlarge the QR-Barcode before scanning. Some camera has artifacts and noises that hinders the barcode decoder to read the code.
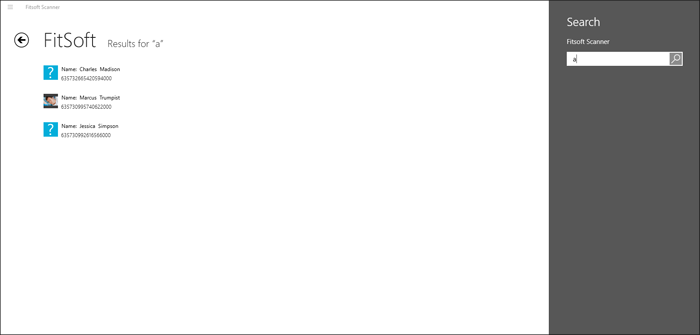
G.) Searching a member:
-
Member searches is easy to do -> In the text field type in the name of the member:
-
You can do a wider search by hitting the left hand corner of your screen -> Click on “Search”
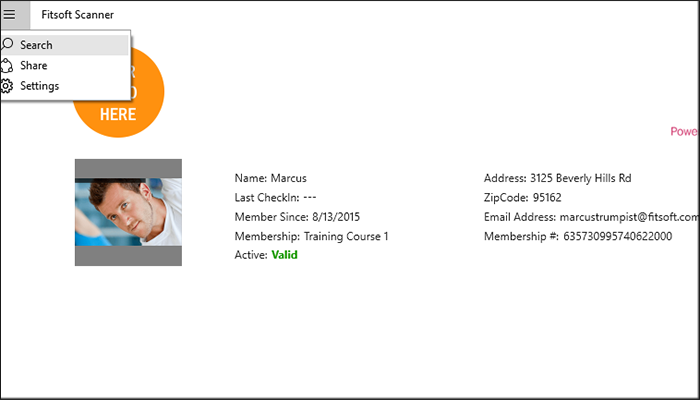
-> Then go the the search box and type in the name of the person you are searching for:
*Find some Bugs. If you have encountered any please email it to us at support@fitsoft.com .