
Creating an Invoice Template
1.) Log into the backend system. Click on “Payments” -> “Invoice”:

2.) Go to the “Template(s)” tab:

3.) Click on the plus icon:

4) Add in template information:

5.) Select template due date and input in net day:

6.) Click “Save” and then at the “Line Items” section click on the plus sign:
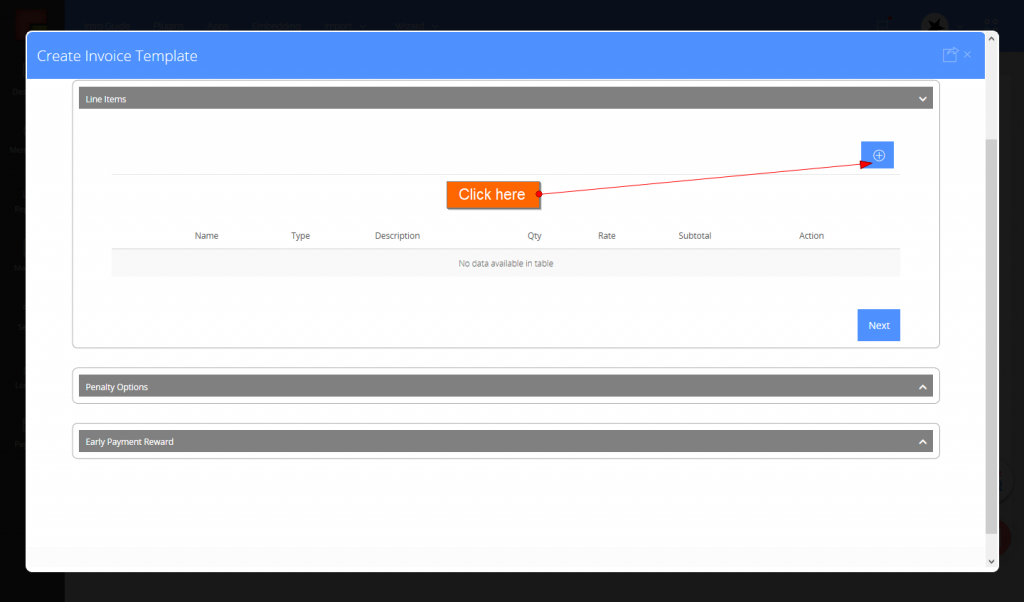
We see a page to add in a line item:

7.) Save the line item and exit it The line item will populate the listing below:

8.) Add in the Penalty for paying late. Penalty will be applied after the due date plus net days. Click “Next”:

9.) Add in the reward discount for paying early before the due date. Click “Save”:

10.) Close the invoice template creation page. The added invoice template is below:

ASSIGNING MEMBERS TO INVOICE TEMPLATE:
11.) Click on the third icon under the “Action” header of the template:

12.) Select the members to assign this template to and click save:

13.) Close the member assignment page and go to “Open” tab. There are the invoices created for these members:

14.) Click on the ‘eye’ icon to view the invoice:

15.) Here is the invoice:

MODIFYING MEMBERS INVOICE LINE ITEM(S) CREATED FROM TEMPLATE:
16.) For the invoice click on the second icon:

17.) This should open up the edit page. Scroll down to line item:

18.) ****Click on the Edit Line Item(s) button:

19.) Then click on the plus icon:

20.) A line item addition page should open. Fill out the information:

21.) Close the line item addition page. Since there is a new category created, there is a new category grouping for the line items:

22.) Each line item can updated by clicking on the “˅” icon to expand its information for editing:

23.) We can add in more line items under category “Special Session”:
Add in line item “Morning Session”:
24.) Special Session line items:

REORDING LINE ITEMS:
25.) Reorder these line item. Click on the drag icon or the first icon next to a line item and drag it. In this example “Late Session” is going to be drag above “Morning Session”:

After dragging it above the “Morning Session”, let it go for reordering:

Click on “Preview”
26.) Here is the invoice in preview mode and the line-items added:

*If you have any questions on technical questions you can contact support at customersuccess@fitsoft.com