
Adding an Invoice
1.) Log into the backend system. Click on “Payments” -> “Invoice”:

2.) Click on the add icon:

3.) A page will appear. Select the member(s) you are creating this invoice for:

4.) Click next, and then fill in the invoice information. Here are some information filled out for this section:
Allow Partial Payment: To allow split or partial payments.
Include Tax: To add tax in for this invoice. You need to set your tax rate from the main settings tax ares.
Due Date: The date that the invoice is expected to be paid.
Net days: Grace days from the due date.

Click “Next”:

5.) This section we will add a line item. Click on the plus icon:

6.) A line item page will appear. Fill out the name and the description of the line item. The amount is automatically calculated based on your selection (Hourly or one-time).
For the “Category” of this line item. The line item is organized into its category so if there are two line items in the same category, they will be grouped together next to each other on the invoice with the “Category” title as its header.

Click “Add” and then we see that the line item is saved successfully:

7.) Close the line item page and the line item will populate the list on our invoice creation page:

8.) Optional: Click “Next” to go to the “Penalty” section. The penalty is applied after the due date plus the net days. Here is a 10% penalty if the payment is late:

9.) Optional: Reward for early payment. Early payment is made on any selected date before the due date. Here it is set to 10% discount for early payment:

10.) Click “Save” and then a confirmation dialog will appear. Close that and click “Preview” to view the invoice that is created:

Previewing the Invoice and Sending out the Invoice to Member:
11.) Here is the created invoice:
Here is its line item(s):

12.) Click on the first icon (paper plane icon):

13.) This will open up an email notification for this invoice and click “Send”:

MEMBER OPENS UP THE EMAIL INVOICE:
14.) Email sent to the member:

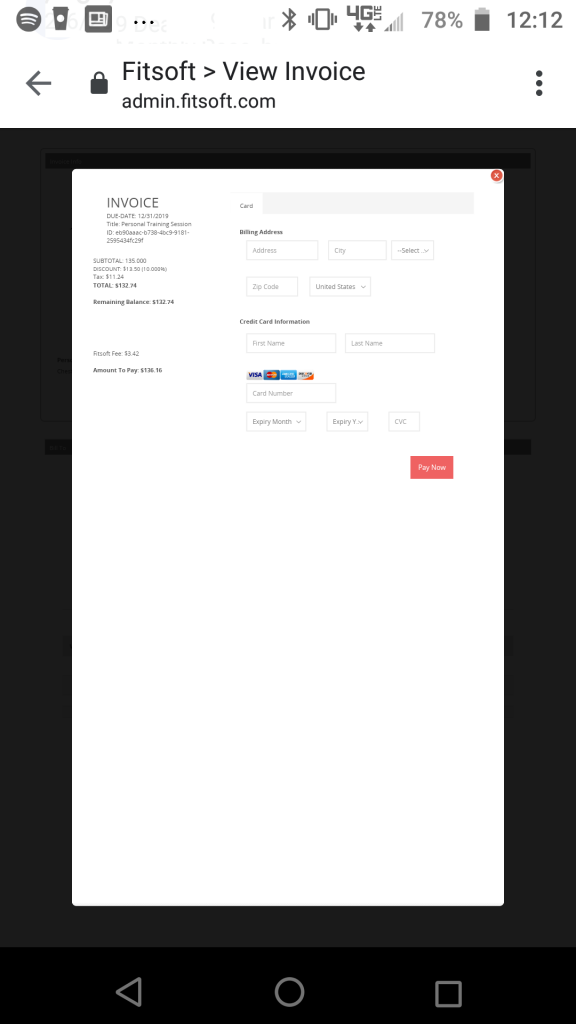
15.) Member opens up the invoice:

Payment can be processed through here:
17.) Close the invoice creation page and there is a new invoice in this area. If the invoice is paid, it will be in the “Closed” tab of the invoice listing page:

*If you have any questions on technical questions you can contact support at customersuccess@fitsoft.com